Draw & Paint - with Embroidery Software
CARINA THAVELIN
June 06, 2025
Create your own original artwork using simple drawing tools or load and edit a design to make it your own.
- Enjoy a full range of freehand drawing and brush-painting tools
- Create and edit vector or bitmap pictures
- Export into many popular image formats
- Create multiply and horizontal/vertical repeats ro create patterns
|
Create your designs using the draw and paint tools and Gallery designs. Save or Export the designs as drawings or pictures. Click on the mySewnet Embroidery icon, You will find the subfolder with Embroidery and Tools |
 |
|
Click on the Tools to find a shortcut to Several different modules in the Software. Draw and Paint is also available in the background wizards of the features in the Create Tab: |
 |
|
Use the Draw window to load or create a vector drawing for your design. Modify a drawing as desired, or make your own drawing. The Draw window contains a FilmStrip to the left and design panel to the right of the Canvas, in addition to the ribbon tab. Use the Paint window to load, scan or create a picture or background for your design. Load pictures or photos, modify pictures as desired, or draw your own picture. The Paint window contains a control panel to the right of the work area, as well as the ribbon tab. Use the Insert tab to add Shapes, Lettering and Designs to your drawing. Use the Multiply tab to repeat drawings or actions automatically by reflecting across and/or down, and by rotating. Use the View tab to adjust the Grid, measure the design, and show and fade the background picture. |
 |
|
The Freehand, Point and Bezier Draw features allow you to work in detail. Draw an outline, place points, or draw Bezier curves freely or over a picture to create your design. Adjust designs using easy editing features: Navigate around the design with the Filmstrip. Grouping features allow you to keep smaller parts of your design together. |
|
|
In the Draw Panel you can start your new design by choosing the colors for your Line and Fill.
You can also choose to not have one of them by clicking the X next to the option you do not want |
 |
|
In the Draw section you have several different options. Use the one you feel most comfortable with |
 |
|
You can use Point Draw to create your design by clicking the shape point by point |
 |
|
Your shape doesn’t need to be perfect, you can click on Edit Points when you are done |
 |
|
Click Edit Points |
 |
|
If you hold down Shift when you move the points, they will be pointed instead of round |
 |
|
If you want to play with your shape you can click on the Multiply tab. Click Enable Multiply and you have several different options. Choose circle |
 |
|
Your design will be visible in the Filmstrip as 4 parts |
 |
|
You can edit the points in several different ways, edit and delete points. If you want to learn more about the different tools, you can click on the ? next to the section |
 |
|
This will take you to the online help and show the section. |
 |
|
Go back to the Draw tab and click Duplicate |
 |
|
Change the colors of the fill and line |
 |
|
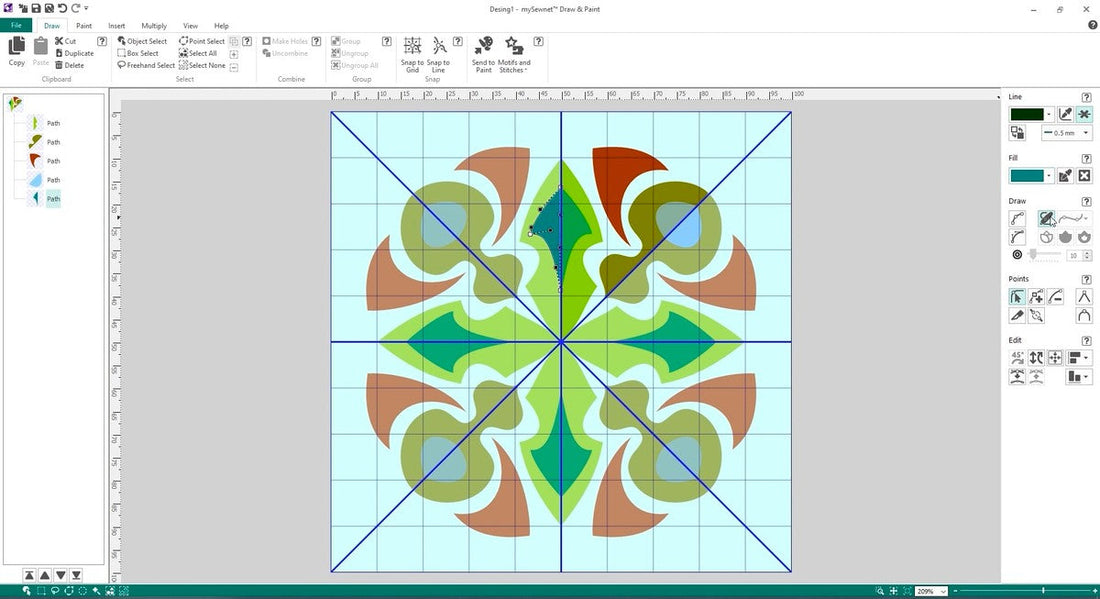
Now you get a second multiplied shape and you can make it smaller and rotate it to get a new element |
 |
|
This is a fun way to play around with basic shapes and get a nice mandala looking design. |
 |
|
When you are done, you can choose Save As, this will save the image in .ecq format. |
 |
|
You can also Export the image as .svp, .png eller .jpg |
 |
|
Now you have an image that you can digitize in your chosen module, like Digitizing |