
Digitize a Popsicle Appliqué Design - Part 2
CREATIVATE Education
June 27, 2025
Precutting Appliqué Fabric Pieces (Cutwork Needle Method)
Precutting your appliqué fabric pieces can make stitching faster, cleaner, and more accurate. You can precut using an electric cutter, in the embroidery hoop with Cutwork Needles, or even with printed templates and scissors. No matter your method, the results are worth it.
This lesson focuses on precutting appliqué fabric in the embroidery hoop using Cutwork Needles.
What You Will Learn
- Benefits of precutting appliqué fabric
- How to prepare fabric for cutting
- How to precut appliqué pieces using Cutwork Needles in the embroidery hoop
What You Need
Appliqué Fabric
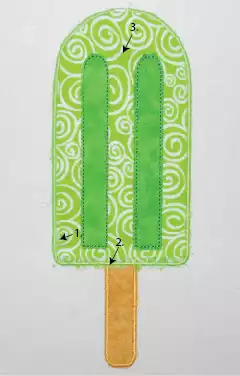
- 6" × 4" Pink, Yellow, Green (outer popsicles)
- 5" × 2½" Dark Pink, Dark Yellow, Dark Green (inner popsicle sections)
- 3" × 6" Tan (popsicle sticks)
Materials
-
Fusible web
-
Steam-A-Seam 2™ is recommended because it’s pressure-sensitive and repositionable before pressing
-
-
Machine embroidery hoop
-
Lesson written using the 360 × 260 mm hoop
-
-
Pfaff™ or Husqvarna Viking™ Cutwork Needles
-
Appliqué cut files exported in Part 1 (“applique cutwork precuts”)
Why Precutting Appliqué Fabric Helps
Cutwork Needles are a great solution if you:
- Don’t own an electric cutter
- Don’t appliqué frequently
- Want a budget-friendly, accurate cutting method
- Prefer to cut each shape with the correct margin automatically
Benefits include:
-
No risk of trimming too close
— Avoid gaps where satin stitches don’t fully cover the fabric. -
No excess fabric poking out
— Your cuts align perfectly with the tacking stitches. -
No fabric bubbles
— Fusible web keeps your appliqué smooth and flat.
Let’s Get Started
1. Transfer your cut files
Send the “applique cutwork precuts” files from Part 1 to your embroidery machine using your preferred method—USB, wireless send, or cloud transfer.
2. Prep your fusible web
- Cut the fusible web slightly larger than your hoop.
- Hoop only the fusible web.
- Score an “X” in the paper cover sheet and peel it back to expose the tacky adhesive.
Steam-A-Seam 2™ with fabric attached is firm enough to hoop without additional stabilizer.
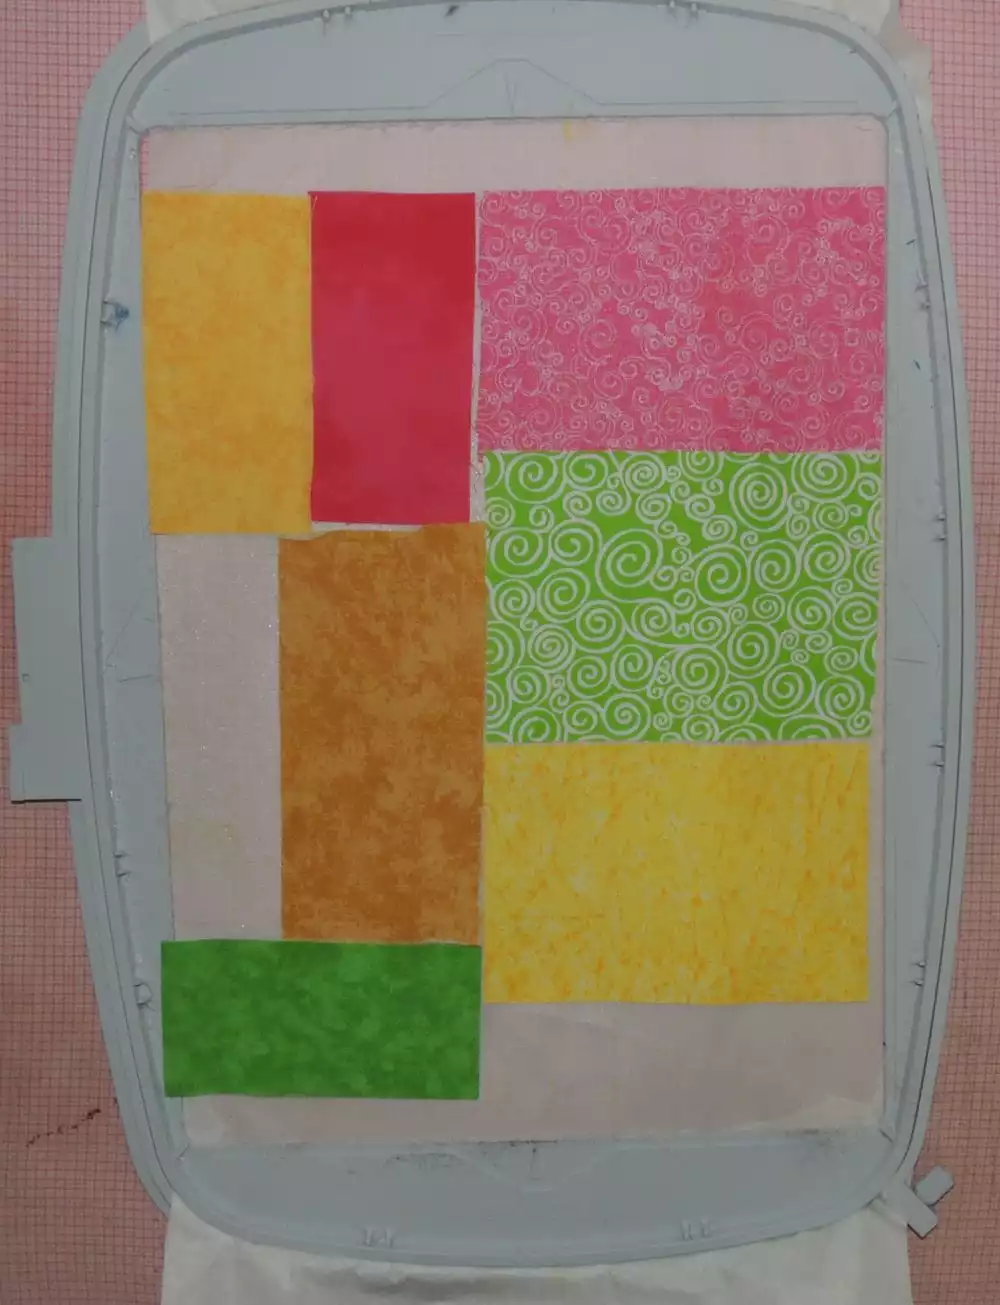
3. Place and fuse your fabric
Position the cut pieces of appliqué fabric inside the hoop—avoid the very top and bottom edges, which fall outside the stitch field.
Fuse the fabric pieces in place with an iron.
4. Optional: Use mySewnet™ Design Placement
If your embroidery machine has Wi-Fi:
-
Use the mySewnet™ App → Design Placement
-
Send a photo of the hooped fabric to your machine
-
Use this image as a background to help you perfectly position the cutwork shapes in the hoop
If you’re not using the 360 × 260 mm hoop, you’ll need additional hoopings.
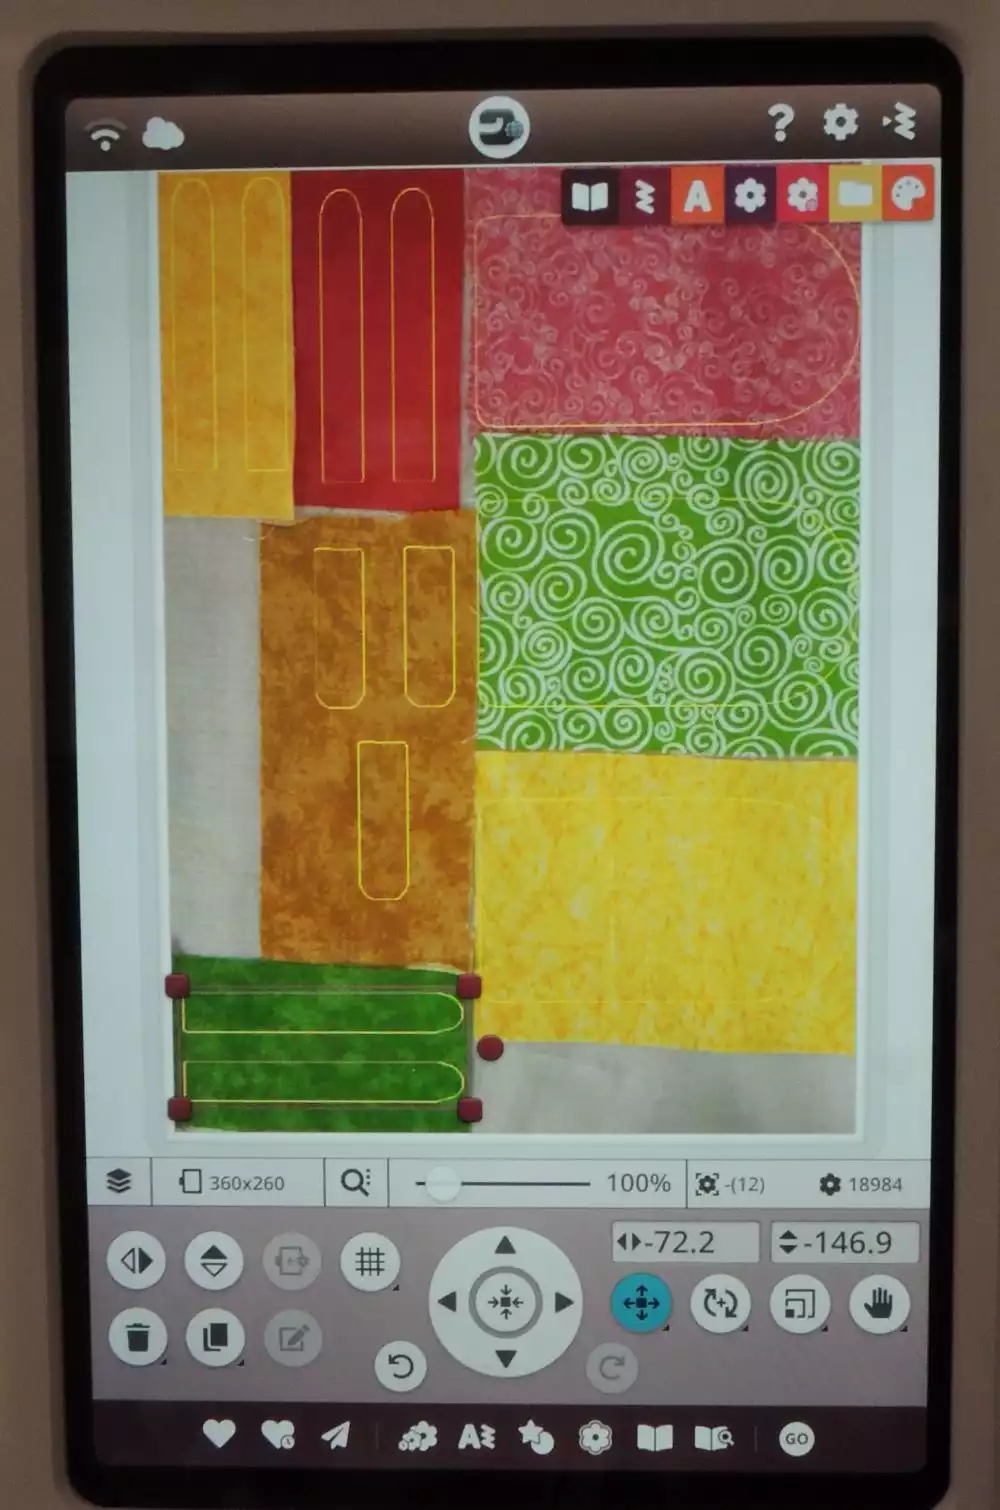
5. Start cutting with Cutwork Needles
-
Insert Cutwork Needle #1 (first color)
-
The machine will cut the shapes for you
-
Switch needles as prompted during the design
The machine will automatically pause when it's time to change needles.
6. Finish and set aside
When the cutwork is complete:
-
Clip the secure points
-
Remove the finished appliqué pieces
-
Set them aside for Lesson 3!