Create Custom Ribbon Embroideries
CREATIVATE Education
June 11, 2025
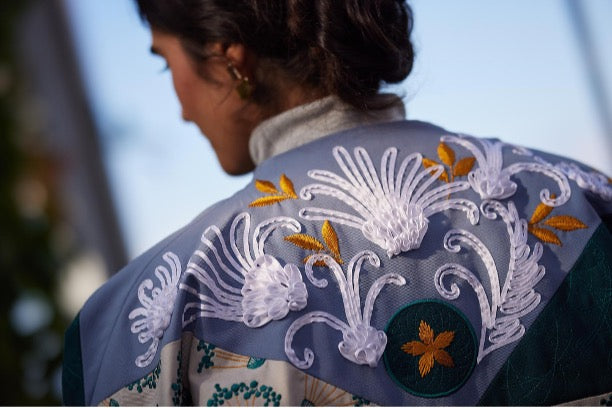
Create Stunning Ribbon Embroidery with CREATIVATE™ Software (formerly known as mySewnet™)
Take your embroidery to the next level with the industry's first Ribbon Embroidery Attachment—exclusively supported by CREATIVATE™ Software (formerly known as mySewnet™)! Easily add dimension and flair to your designs using real ribbon.
Why Ribbon Embroidery?
With CREATIVATE™ Software, you can craft unique ribbon embellishments by:
-
Selecting from a library of pre-made shapes and forms
-
Or drawing your own custom lines for endless creativity
Helpful Tips for Designing with Ribbon:
-
Plan your path: Use continuous lines when possible—plan your start and stop points carefully. Ribbon designs cannot be split.
-
Mind the curves: Avoid sharp corners or loops smaller than 5mm in diameter.
-
Layer wisely: You can stitch over the same ribbon line twice, but no more than that.
How to Add and Use Background Images in CREATIVATE™ Software:
-
Go to the View Tab > Background Wizard.
-
Click “Add New Background” and choose your image source:
-
Load Picture from your computer
-
Paste Picture you’ve copied
-
From Scanner or Camera
-
Create New Picture using Draw & Paint
-
-
Select your image (we recommend using the included leaf image from the sample files).
-
Step through the wizard to Set Size to 200mm.
➡️ Important: Keep the image at least 40mm smaller than your hoop width for proper Ribbon Attachment fit. -
Save as “Ribbon Leaf” under My Garments.
-
Adjust the background opacity to 50% for easier design tracing.
Drawing Your Ribbon Design:
-
Switch to the Embellishment Tab.
-
Zoom in for a clear view of the hoop.
-
Choose: Ribbon > Draw Line > Point Line.
-
In the pop-up, set ribbon size to 5.0mm, color to light blue.
-
Click to outline your design, starting in the lower right corner.
➡️ No worries if it's not perfect—you’ll refine it next! -
Right-click to finish, then select Edit Points to adjust your shape. Add or delete points as needed.
Finalizing Your Ribbon Embroidery:
-
Use Properties to adjust ribbon width or check how much ribbon you’ll need.
-
When happy with your design:
-
Go to File > Save As to keep an editable .vp4 file.
-
Use Export to save in the correct format for your embroidery machine.
-
-
Under File > Print, print a template at 100% scale for placement and testing.
Tip: In Export Settings > Configure, you can fine-tune options like combining or color sorting for projects like appliqué.