Serger & Overlock Basics: What You Need to Know
CREATIVATE Education
June 27, 2025
Serger & Overlock Basics: What You Need to Know
A Quick Guide to Threading, Testing, and Tension
Once you’ve threaded your serger or overlock machine for your desired stitch, keep these essential tips in mind to ensure smooth, successful sewing.
Before You Begin
1. Always test first.
Sew on a scrap of your project fabric before stitching the actual garment.
Make any adjustments—tension, differential feed, stitch length—on this sample, not your project.
Setting Up for Stitching
2. Position the threads correctly.
Bring all threads over the stitch plate and slightly to the left under the presser foot.
Turn the hand wheel toward you slowly:
-
Confirm the upper cutter moves correctly against the stationary cutter.
-
If it doesn’t, check for fabric or stray threads between the blades.
3. Hold the threads with light tension.
This helps the machine form the first stitches cleanly.
4. Turn the hand wheel 2–3 full turns.
Manually create the beginning of the thread chain.
Check:
-
Do all threads wrap around the stitch finger on the stitch plate?
-
If not, recheck that the machine is threaded correctly.
5. Continue forming your thread chain.
While gently holding the chain, press the foot control and stitch until you have a 2"–3" (5–8 cm) long chain.
Sewing Your Test Sample
6. Place your fabric under the presser foot and sew.
Guide the fabric lightly with your left hand—do not pull.
Pulling can deflect the needle and cause breakage.
7. Chain off at the end of your seam.
When you reach the edge of your fabric:
-
Keep sewing
-
Draw the fabric backwards and slightly to the left
-
Continue stitching to form a finishing chain
This prevents unraveling and sets you up for your next seam.
8. Cut the chain.
Use the machine’s thread cutter to trim the chain, leaving 2"–3" (5–8 cm) at the end.
Pull the threads under the cutter from the back, then toward you.
Thread Tension Basics
Proper tension depends on:
-
Stitch type
-
Fabric type & thickness
-
Needle size
-
Thread weight and fiber content
Balanced tension produces smooth, even stitches.
Correct Tension Looks Like:
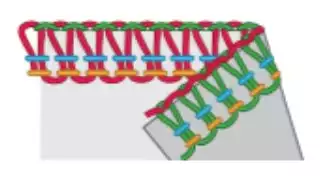
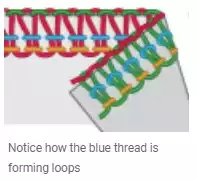
- Upper and lower looper threads meet at the fabric’s edge
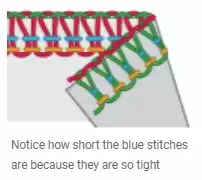
- Needle threads appear balanced, with no loops or tight pulling
- The stitch looks smooth and even on both sides
Adjusting Individual Thread Tensions
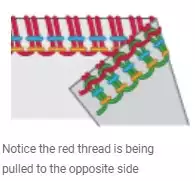
Upper Looper Tension
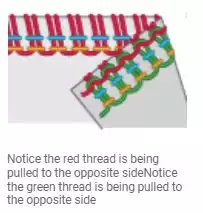
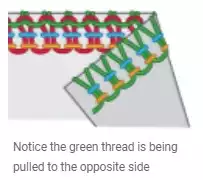
- Too loose: Tighten upper looper OR loosen lower looper
- Too tight: Loosen upper looper OR tighten lower looper
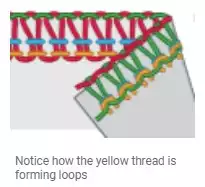
Lower Looper Tension
-
Too loose: Tighten lower looper OR loosen upper looper
-
Too tight: Loosen lower looper OR tighten upper looper
Left Needle Tension
-
Too loose: Tighten left needle OR loosen looper tensions
-
Too tight: Loosen left needle

Right Needle Tension
-
Too loose: Tighten right needle
-
Too tight: Loosen right needle